Some links in this post are my affiliate links.
If you have a kitchen from the 1990’s like me, you probably have honey oak cabinets that you want to update.
I searched and searched for ideas to update them, and most of the suggestions were to paint the cabinets. Let me be super honest with you. I don’t have time to paint my cabinets nor am I a master DIYer!
Painting requires sanding and precise application of the paint. I knew I didn’t want to spend that much time or detail painting my cabinets.
So after much research, I discovered another solution. Here’s the before and after of my cabinets.


In this post I’m going to share how I updated my oak cabinets without painting them by using a stain called Briwax (affiliate link).
It doesn’t require sanding and is very easy to apply. So if you want to keep things simple like me, you’ll still get great results with this product!
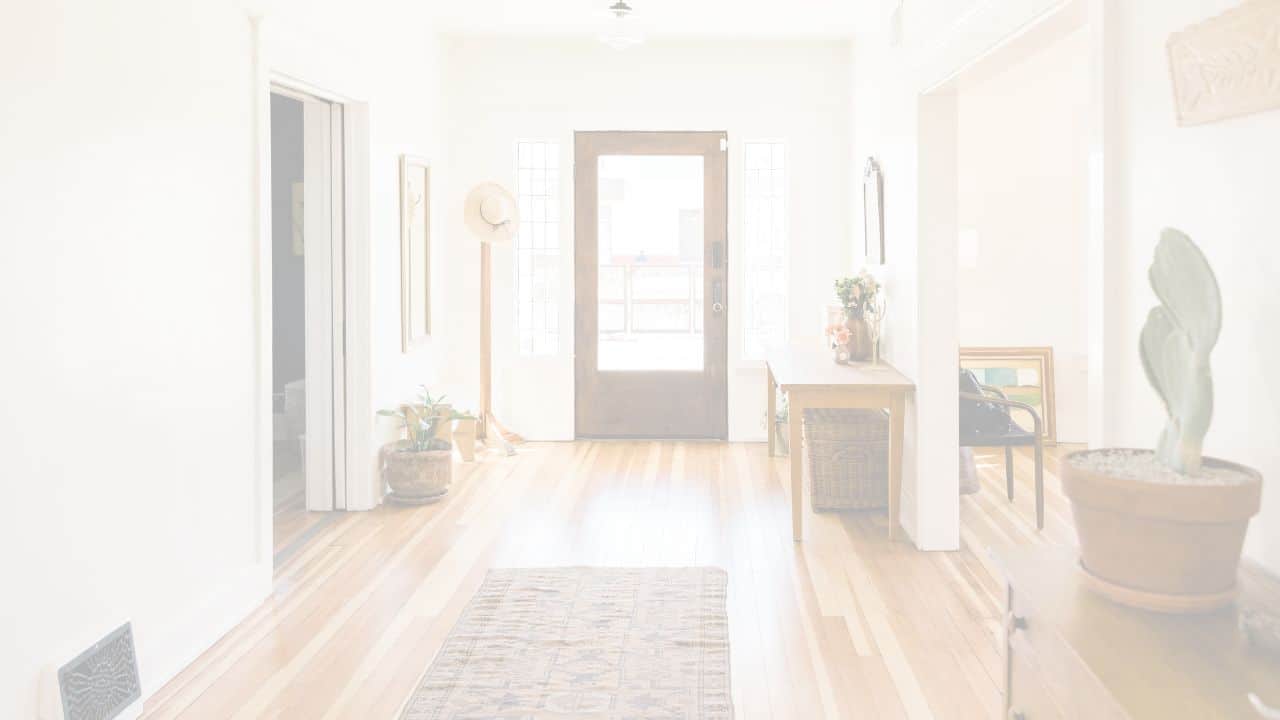
First, here is a before picture of my oak kitchen cabinets without Briwax. Very basic. Very orange!

Supplies Needed to Apply Briwax
- application cloth
- buffing cloth
- Briwax (I used Tudor Brown.)
- mask (optional)
How to Apply Briwax on Kitchen Cabinets
1. Wash all dirt and grime from the cabinets.
This is the best part. You don’t have to remove the cupboards unless you want to. You also don’t have to sand them! Just wash away any grime.
If you have grime in the little corners that are hard to get out, try using a toothpick!

2. Apply Briwax stain to cabinets.
Before applying the stain, I strongly recommend wearing gloves as it is a bit messy. Then using a cloth cover the section of cupboard you are staining.
You don’t have to use a lot of the product. A little bit goes a long way!
I suggest starting in a lower cabinet that isn’t the first thing people will see. That way you can get used to using the Briwax on the cabinets that aren’t as visible.


3. Rub in excess Briwax with a different cloth.
This is the hardest part (but still easy!). Once you have applied the Briwax, it will take some elbow grease and time to rub in the stain. You don’t want any clumps leftover. It should be dry to the touch.
Once the Briwax has set, you can take your updating to another level by updating the cabinet hardware.

SOME CONSIDERATIONS BEFORE USING BRIWAX:
1. This is my personal experience. You may get different results. I’m not a professional.
2. In the pictures I’m not wearing gloves. However, I quickly discovered that I needed gloves. Trust me! 🙂
3. Briwax has a VERY strong odor! You may want to wear a mask.
4. As others have pointed out, it does NOT work on wood that has a polyurethane finish to it. The Briwax will not stick.
5. I suggest trying it on the back of a cabinet door first to see if you get the results you want.
6. If you have specific questions, you can contact Briwax on their website.
4. Update the cabinet hardware.
My kitchen cabinets didn’t have any handles to being with, so this was the perfect time to add some. I purchased black knobs for the cabinets and black pulls for the drawers.
I personally love the look of wood and black metal, but that is total preference.

I also updated the kitchen faucet which made a big difference in the overall look and feel of the kitchen. This is the faucet that I purchased.

UPDATE: I painted the kitchen walls and added a faux backsplash. See the kitchen updates here.


I hope these Briwax before and after pictures inspire you to update your honey oak cabinets even if you can’t paint them!

53 thoughts on “How to Update Oak Cabinets with Briwax!”
Love the update! I recently painted my cabinets and while I love them, it was A LOT of work! You’ve definitely inspired me to update the faucet next! Awesome job 🙂
I bet your cabinets look great! I love the look of painted cabinets. I just know I couldn’t do them right. Yes, updating the faucet was way easier than I thought it would be and it elevated the whole space. You’ll love it!
Wow! They look great, Emily! Good job!
Thank you, Kristen!
Omg I’m so excited you posted this!! I have the same outdated cabinets and was telling my hubby it would be thousands to redo the kitchen! Well now I can try your idea instead!! 🙂
YES! If you like the wood look of cabinets, this is such an easy and inexpensive way to update them. I hope it works for you too!
Which color of Briwax did you use?
I used Tudor Brown.
Do you have to seal this stain?
No, the Briwax works as a stain and sealer in one.
Great job Emily ….I have golden oak cabinets that I want to update. I think I will try your method which you explained very well. However, being older, I think all the rubbing and buffing might hurt my arthritic shoulders. Do you think I could use a electric buffer. What would you suggest.
I have no experience with an electric buffer, Linda. I’m sorry I can’t be more help. However, applying the Briwax is quite the arm workout. I remember feeling sore in my shoulders and upper arms afterwards. Maybe you could enlist a friend or family member to help?
I used an electric buffer!!! Love this. Our cabinets look gorgeous 😍
Did the briwax buff to a hardened finish? Curious about wax alone and durability
Yes, it hardens and has held up for almost 2 years now.
So excited for this option! Thanks for posting this! I have the same exact cabinets and do not want to go through the work of painting them especially if wood is coming back around. Just need to tweak it a bit and this is the answer! 🥳
Yay! I’m so glad that a version of this will work for your cabinets!
I can’t believe something as simple as Briwax can totally transform the look of a kitchen! We had our cabinets refinished a few months ago and now we’re looking into DIYing the cabinets in our laundry room. I’m definitely considering Briwax now! Thank you for sharing!
Hi! How long did you wait in between applying and buffing?
Did you come back and buff right away? Wait 10 minutes?
Right away! You don’t need to wait.
The sides of my end kitchen cabinets and also sides of my island are not wood.. any suggestion on what to do to make that match after doing my cabinets?
So you may want to try lightly sanding the sides and see if that works. However, the Briwax is made to soak into the wood grain, so I’m not sure that it would work if the sides are not wood.
I have the same on the ends. I was wondering what to do too!
I went ahead and used the Briwax. I think sanding would have left a lot of marks and looked worse. Since staing with the Briwax my neice was over and was rubbing her feet on these ends and it came off on her socks. I will be going back through and putting a clear coat on the cabinets and these sides.
Interesting! It may be that the Briwax hasn’t had long enough to harden on the surface. I’ve also noticed that it has rubbed off where my trash can hits the side of my cabinet that is made from particle board. I don’t think Briwax is intended for that surface as it soaks into the grain of actual wood.
Love this idea, bc I did NOT want to paint my cabinets. What color stain did u use, so many choices?
I used Tudor Brown. I’ve also heard of people using dark brown on the same cabinets and liking it.
Did you stain the trim around your window as well? I want to update my cabinets but worry the trim will look weird??
I did not. The window frame does look lighter than the cabinets, but it doesn’t look bad. I also have curtains covering most of the window trim. I believe it is personal preference.
I love this! I am curious, how are your cabinets holding up after a year?
Hi Christa, they have held up great!
This looks great, Emily! I’m curious at how far you took it into your home. We are considering our trip and a mantel, but also have 6 panel oak doors, so doing it all sounds a bit daunting. Thanks!
The kitchen is the extent that I have used it! However, someone on YouTube commented on my video that she had done her whole house, trim, doors, windows, and she loved the result.
What is the name of the Briwax stain color that you used? I love that color.
Tudor Brown
Thank you so much for the idea!! I spent $22-23 on the Briwax and my cabinets look 100xs better!! I think they look much nicer than painting! This did take a lot of elbow grease but if you have some help you can get done in a day (only took me two)! I ended up lightly sanding the cabinets in order to get the Briwax to soak in. I can’t wait to update with handles and knobs! Thank you again!
I’m so glad it worked out for you!
Hi Emily, I just finished updating my Oak cabinets with the briwax this past weekend and I love them. Really made the grain come out in them. Thank you so much for the idea
Oh, good! I’m so glad you like it!
How is it holding up?
Sorry! I had not read through all comments! Glad to see they are holding up!
I’m soooooo happy to find this option & can’t wait to try the Briwax on my trim & interior doors! I think the Tudor Brown will be perfect with my new LVP flooring. What kind of solution did you use to clean the cabinets before applying the Briwax? Thank you for sharing your experience!
I have been going back and forth on whether to paint my kitchen cabinets white or make those honey oak cabinets more rustic looking. I had purchased 18 black laurey nobs for$8.50 last summer and I sanded my bathroom vanity down to bare wood. When I saw this I said”THAT’S EXACTLY WHAT I WANT!”. But I didn’t want to start sanding etc because I’m exhausted. So glad I found this post! They look amazing. Ironically my faucet broke and I also have a white sink but wanted to get a black faucet. Now I know what it will look like.
PS…I believe I have that exact same towel! I’m a thrift store addict. Beautiful. Thanks again!
That’s amazing! I’m glad I was able to give you a glimpse of what your kitchen could look like. I hope it all turns out great!
Looks great. Can this be used on trim?
Absolutely! Someone commented on my YouTube channel that they had used it on all the wood in their home. Even the trim!
Hi, so excited to find this idea, thank you! How are they holding up under your sink, did you have to put another type of sealant to keep water from staining them?
They are holding up great after 2+ years. I did not add a sealant.
This is amazing and I’m going to do it! Did you completely remove the drawers and cabinet fronts to do the frame or did you just work around them?
I just worked around them which worked out fine. However, if I did it again, I’d probably take the doors down.
I love how this turned out! Your kitchen is beautiful, thank you for sharing
Glad you loved it! Thank you!
I read the other comments about the sides of their cabinets not being wood. My cabinets are also like that. I am going to put beadboard on the sides and then I can stain it to match or paint it a color to accent the kitchen!